What Is GA4?
Google Analytics 4 (GA4) is a free tool for tracking visits to websites and apps. It also tracks interactions that occur on these platforms.
This tool provides insights into traffic numbers, user demographics, most-visited pages, and more. Google developed GA4 and its predecessor, Universal Analytics (UA).
In this guide, we’ll explain how GA4 differs from UA, how to set up GA4, and how to use it to track your website’s performance.
How GA4 Tracking Differs from UA
UA was the earlier version of Google Analytics before Google launched GA4 in October 2020.
GA4 differs from UA in key ways:
- User interactions: UA called user interactions “hits,” with specific hit types for page views, events, and other interactions. GA4 calls all user interactions “events.”
- Google Analytics account structure: UA accounts could contain multiple properties, which could then contain multiple views for filtered data segments. GA4 accounts can still contain multiple properties, but they cannot contain views. Unlike UA properties, GA4 properties can receive multiple data streams from websites and apps. UA properties tracked data from only one source.
Standard UA accounts stopped processing data on July 1, 2023. If you want to track website performance with Google Analytics, you need to set up GA4.
Further reading: Differences Between GA4 and UA
How to Set up GA4
Setting up GA4 involves five main steps:
- Create a GA4 Account
- Create a GA4 Property
- Provide Your Business Details
- Provide Your Business Objectives
- Create a Data Stream
1. Create a GA4 Account
You need a Google Analytics account to set up GA4. If you don’t already have one, go tohttps://analytics.google.com/ and log in to your Google account.
![Google account log-in](/_static/blog/uploads/media/af/09/af0902204363e32b991094d51aac9798/20dac395a7ca620a355c2fa81a8349d2/AD_4nXca9kgPm21L-eTNy1DhB8ZlgsU-b5J1-qvca18lPZGq1ohS3lBQF3TGZpw6AvvF9xW5CJQdeJA9l1hZ8TFH_qfABClzt2GfaWWS950rARqTzXDJgXVOmCsTisFWoC-FOFsULj21.png)
After logging in, click the gear icon on the left sidebar to access the “Admin” settings.
![Google Analytics “Admin” settings](/_static/blog/uploads/media/ef/46/ef4670ac69c6d17be56437593e8d997f/f4d1df6f67d9e98686d3495bf0f60397/AD_4nXd5Y4gWXnSmiy34y1Lih931OZWnmwZJz1u38oZDZDC58T5LRGBrzYKMEvJj_ozbvlkPRZ4oXi8FZeJPnOYtN1LHXa36vhVRu0tQFH-NFEEvtj1XR_Dl0wU19mDh7URacOJWF4jJog.png)
On the Admin dashboard, click “+ Create” > “Account” to create your Google Analytics account.
![Google Analytics Admin dashboard](/_static/blog/uploads/media/c9/c3/c9c3e0707a062b82ac8a2a42edeb67e7/33f19a03f3f2b1a2ce080469dbd61a31/AD_4nXfJzhwIALOBOzNESHRJuXhJlwtJ7hk-WCtpOulysij_O8G4eGd3ZIrE9A_wBD4n1DLLSLIQ5cU1OhbQWHvola7sCaFUMV6JTUbeGk5wIQzpV3weOMfD6pYT_88n8m0nHLcO2e4zVQ.png)
Give your account a name in the “Account name” field. Use the “Account Data Sharing Settings” to select how you want to share your data with Google.
![Google's "Create an account" window](/_static/blog/uploads/media/72/09/7209bf8a8cd6651d18cd57e637d839f5/6be2c96b6fd604620dfcfac4e0135e22/AD_4nXcFmkmIsbS546470SKOp3CHxKZdxG_t2wpBHqnyHTEHI6zmDQmkA4qN5w3YF2cBflmK5EetubxM8397aO_ExqUPdA22dqRrEJD6Lmf2bOBKU51lGjxongd599MwmsT6y1HkPeJg2A.png)
Click “Next” when you’re done.
!["Next" button highlighted at the bottom of "Create an account" step](/_static/blog/uploads/media/04/ea/04ea547e199462719097eb14f254fe60/6287a68054ff90ce59519941ab0edf04/AD_4nXeJiulPGzDeLk9qK7xC_Qa5mQtDeLJyics0WO-BKMa2lWEhRxkExcQ9WmQJkp74shrcP7FsCwkTHNyvT29XCNLXyAOBbj-5k55JZ5fFLEasH7xGpDzYpC3Z0irrS6uWhb1FbcwVdQ.png)
2. Create a GA4 Property
A GA4 property is a collection of data from a website or app. A simple property example is one that has data from only a single website or app. If you have more advanced reporting needs, set up a property that gathers data from multiple sources.
To create a GA4 property, provide a name in the “Property name” field. The name must contain at least four characters. Then, specify your preferred time zone and currency.
!["Create a property" window in GA4](/_static/blog/uploads/media/90/cd/90cd67e6b479b9c62b87892be60d3a8b/ac596364d52f6c98d7f54a016843453e/AD_4nXc9HRwcZuljJNSzAuRfwa5_LErUcXJaSz7vC57187wg5FQQpRjFCqDLc4RQFDs1cZ3tO4xu5HJUdDe4YwcNffeb5XoS9oAZJHP_EXFvT0PNBC6glJ7EaJRecq5QodWJvJoKuRSf.png)
Click “Next.”
!["Next" button highlighted at the bottom of "Create a property" step](/_static/blog/uploads/media/fc/53/fc535fb2e82c8a1d463ad037141e7c95/21a60031cc0784b21c060d0821aa2414/AD_4nXdywwiHLeE5a68dsRkxpgHwuy31zouOtTt_mCIqvDXIt4QKyoUEp7AMWE0JaOKp1ZAT-FN7hyNXHeRrV3bCbADI7x9EOTU-qKIZyCizOKcAl2dI8JJs0lm2sAoxirmoI79Oa5ghkQ.png)
3. Provide Your Business Details
Fill out the “Industry category” and “Business size” fields.
![“Industry category” and “Business size” fields under "Describe your business" step](/_static/blog/uploads/media/23/e1/23e1c83cd21c16385f7f187a2edefd9b/53ff80fcc39411a4e476a35ff2df389f/AD_4nXeg6xJ1Tuwk84R0nf-eTW5jkG5ijawwc4He3nKeE42RVGdkHP1dYTd487WVb0Av0h6n-moOGaw4_D4XZOX22RuUzME5ymB-t24tzTSrhyMi4vFmL4uiRZ1YqdN5n77SRbfpCKxl.png)
Click “Next.”
!["Next" button highlighted at the bottom of "Describe your business" step](/_static/blog/uploads/media/3f/47/3f478d54dc5583c57f072a21d69373db/d302446928dd00be71a6607b8c131a22/AD_4nXfjUKupH24l5DPexO1n5Xyhut78gwnKalTaGKRa6VNkakqS3gH4lib-Is7yOgoiRjhK0_GoWg1WMgEhxCc6h6QKZ8eW2YMq6xe7Cy3fcrviEFCTUyvLJeIPjWpFHXmUTcjmrirZaw.png)
4. Provide Your Business Objectives
Select at least one business objective. GA4 uses these choices to tailor its default reports to meet your needs.
!["Choose your business objectives" window](/_static/blog/uploads/media/18/b6/18b65c73fae456b13af865f9fd64562b/cb3e6f9db4000099413873cdb18e6e17/AD_4nXeZJgT3Lmk8796BfHNIDavpOxXQoi2bfvpndPRy31WZhjSw2wgKPrdKbXHWu0YJpNNWV_-DWM3Q0-eiOMfz4UWu-ItsJ4LMDeMBVFscK7a7VB20zAjHmoo2vH1-soi1RBQJFEkRnA.png)
If you select “Get baseline reports,” GA4 will provide reports covering the entire customer life cycle instead of reports focused on a single business objective.
Click “Create.”
!["Next" button highlighted at the bottom of "Choose your business objectives" step](/_static/blog/uploads/media/6c/11/6c116ecfdf420eb080861573613b93e2/0c100b026c64bda50b4c44fc444c8ab7/AD_4nXfUJbR1JdftQivGrYMnky7mIKcLSIVlvMtQOtlKy-4OTUPyfQROQP1F0BiMGY_nktWx3seN1Edd83bwCaEiOguRfF4Xe2klWV4udoYEtJUCSKz3jqcAuFO-6oJkCTyJMBXtz3mMWg.png)
Google Analytics’ terms of service agreement will appear. Adjust the country setting if needed.
![Google Analytics terms of service agreement screen](/_static/blog/uploads/media/5d/dd/5ddd7e977ac448fc9ed2c4563977b348/6d2b243a71f91c17136541b49355f1b5/AD_4nXftjBinz3BzwzzoB6HrEdzBBv7jSYEFy0hplcGnc1yxFTuu-3H9AguvsE-2j_145sCd7xHc15L7cvl5X0ks5C60cT4M4ZLzfmb9oKLl9kgrvXxx4D94dHCN_HORf9F5GAXwbF1e.png)
Review the agreement. If you accept, click “I Accept.”
![Accept Google Analytics terms of service agreement](/_static/blog/uploads/media/cf/5c/cf5c66591699d1380610723fb440165d/617423ee633e3a1a990e927363feb424/AD_4nXf-jVZx1qM8yH4J6E3MT7GP3oeEyGWDMsryADS5PZqka-ulS5itk18zy5FSRfUyekoau-9--Gqvx2gnslHdbjiTEDuatPyySvLXz21zKh2t0n6xZMFHTnjPtusyO__IR97263IQyg.png)
5. Create a Data Stream
A data stream sends data from your website or app to your GA4 property. Creating a data stream depends on whether your source is a website, iOS app, or Android app.
To create a data stream from a website, click “Web.”
!["Web" option selected under "Start collecting data" window](/_static/blog/uploads/media/8e/be/8ebe962fe1f9f49feba30333f55a5fc9/01afa60b05973c1fa2b125b179ca8dbb/AD_4nXemFXng-HbFT8XN-adGmxOIZcJuZtVgg3sJ0l9tevlTAW3ND0EgV0GpwfwsPt-Dat7YRzz4zccJaze9_8aubZIus1ATVvSOk1uWSz-l-bV6U1TURVZeZVhjb9DuZbA6C-s262t_.png)
Type your domain in the “Website URL” field. Provide a name in the “Stream name” field.
!["Website URL" and "Stream name" fields highlighted](/_static/blog/uploads/media/20/99/20994cc43286acdc37b8eaa59c2c8a1a/9d9c4ecb96f1d868498636bb858cab3f/AD_4nXcQ95r38PXKDRty1STCD2ppJIJuQk6DbAUG1yJeU8T_8hi8IW2SWf5Fud0zpi-13SZktPkfvTwdmXzjzKOBzierrWUf5k8bIcSvLQRqLYCVEkX_ogsl8iyEXD7FTjqs74nidRhpKA.png)
Then click “Create stream.”
!["Create stream" button](/_static/blog/uploads/media/5b/33/5b3330ddc2a346fb6dcf4dcbaf4dae02/b97b4f4815c4f85f13f39127fd72f88e/AD_4nXdCk1esjdSvem3rMoWl1h4Ssob7bzeSV44NISNuQR4p05KfJ-qESRVo8rb_iWfJY3rf56Z_VcnJZgF9tAoLBz6LG2oqBmofcqt71PyKcsd5nJy2lLevxl1rj1KO6P6Z9MVGic8W.png)
A window will appear showing your data stream’s measurement ID and other details.
![Web stream details window](/_static/blog/uploads/media/62/f8/62f87eba02de085db8f81a9a60a9bacf/67c6cc2ebda42da3560b9d354e12fa1b/AD_4nXdBVca_Ti-9Q2vDw_jQg0Q6BiNHG2f9S6O8luuyemdRuSfcQNg_SamBAlqEGDIvJYnIWjn5SV9WzWLTcgF-jj2x5KmlrhmzLo55D3F4C3UaFwU7qrPNtjBo0Ulc6xwrwxrYKFEkCw.png)
Save the measurement ID somewhere convenient. You may need it later.
After creating your website’s data stream, the next step is to install GA4 on your website.
Further reading: This guide covers creating data streams for iOS and Android apps.
How to Install GA4 on Your Website
Watch this video for an overview of the GA4 installation process on a website:
![Youtube video thumbnail](https://i.ytimg.com/vi/0LT7aK2Gga8/hq720.jpg)
Below, we’ll share the steps for these three GA4 installation methods:
Use the first method if you have Google Tag Manager (GTM) on your site.
Use the second method if you used a website builder like WordPress, Squarespace, or Wix and don’t have GTM.
If your website doesn’t have GTM and can’t integrate with GA4, use the third method to install GA4 manually.
Method 1: Install GA4 with Google Tag Manager
GTM is a platform for adding code snippets (called “tags”) to a website without direct code edits. This includes tags for GA4.
If you want to use this method but don’t have GTM installed, follow these steps to set it up first. You’ll create a “container” that holds tags and other modifications in GTM.
Then, go tohttps://tagmanager.google.com/ and log in to your Google account.
![Google account log-in](/_static/blog/uploads/media/67/47/6747ed5baf1118d954ee58a83944e5a3/3b96200934034f4e76f08a87e09ca271/AD_4nXcyuBwI809DX8wxDRJH3d54_-9XzkJrnkoBsKfMHQMMPcgpq-KBOKoWgS83b90-07paI16nn5ZEuNrhrJIIRvENBf2eGwOCV9ZOc18zUV0UYsOxNCSPnxr9EWh5VTxe4gc8zOcjKQ.png)
Select your website’s GTM container.
![GTM container selection](/_static/blog/uploads/media/c3/c9/c3c93fd73f53c9be7f83be03b3c8fdc2/ca1eecef7a7f3901d8541420e61acd5d/AD_4nXeAsILM5xTN1C6qcpv8Lozh9KDjNRZ0Lg_xcHId_MT7VZVtzQwaiOgmNv872bzYNajmiHiqzzkbkVVkEWMTYWluAYNxT3ZNz1Nqy-ZYQPEHUl8yRxsTyvP0YyfWnIc2G_HQk3KN.png)
Click “Add a new tag” on your container’s workspace overview.
!["Add a new tag" option highlighted](/_static/blog/uploads/media/b3/b1/b3b150961838b7f91438c212f3a09ad9/49cd0e85986d14e90c175cc45cc21d17/AD_4nXeae9icd0XuM4hGlXWXoAoweJ97jV-6PS0-QmElFZlj8UQxyDo-bzoeH7zCr9zU3A0hgGpHVn6wD3idyfNt7tJ8JTbjQ5SeUJ6awck7ffDZj9B6kkWb48DCdLGLwK7qnfpNVAp8BA.png)
Click “Untitled Tag” to name your tag, like “GA4 Setup.”
![“Untitled Tag” field highlighted](/_static/blog/uploads/media/26/8f/268fdc68271e4f183a4edd2949423cf5/2af897a8446ef6e61a8f9a83ae6353ed/AD_4nXfm4hvEBr9q6ArA-w3j3Q2xG1rbd__lOzUL2x269KpSg7CJz-ZRnGJZ3SL3vDMo2RBlcDHHBEhFyjVXKWS4WrKz8Tgj77zCcbMSwjIHpM7zmJg2SAj8PVNHE9Rsd4nD3mRpv_Qr.png)
Click anywhere in the “Tag Configuration” panel.
![“Tag Configuration” panel highlighted](/_static/blog/uploads/media/d5/c4/d5c4620d740fafb7b5d8954e80fdb60b/eeb90c324fe11ee956a11ab527194e70/AD_4nXeENe9JnixINr8OEhuOvtTi6ZR2B92xKbnedY5Vmuj-XvLhscd9lybj1CkH3km66MGnCTrffkaNDQ_KMs19hdBLCMa_BywfTzFcjdPE2oOT0W6ZDvvNu3aCcC7NvupzcuauSTVa.png)
From the “Choose tag type” window, select “Google Tag.”
!["Google Tag" option selected under the “Choose tag type” window](/_static/blog/uploads/media/b4/ce/b4ce840c7f54b7cd0d8867dc83f59e86/6e12b6ce7456e26f8fb1738d568d3cd2/AD_4nXfylc-auNhrGS4pnzxdy6ZJHB0ytGDjnShkzrUAXRPcflM-jR9Zn6CtCW9zQCFEBIF9P5mb_TLmxkYPIWgMybobNFnQ0KnobUj0vjizrMY6YHYir60J2_HnMj7-WaFAWY_eIgf3.png)
Fill out the “Tag ID” field with your GA4 data stream’s measurement ID. If you haven’t saved it, learn how to find it here.
![GA4 data stream’s measurement ID added under "Tag ID" field](/_static/blog/uploads/media/86/29/862926fd34ef759f165d4b087d9d29e4/367c9a056d1201efdce428f045924606/AD_4nXeW9ph7-ryCchmukrq6xGd7GsBAkJSeAJYSOHedZPH2OfmkZWC8YiLeiNNU2exwUgbkXlyB3pYWueLewnKcZs4LjmVmOKco2GgyKIPUSDTUKd37mSd8KYd24_25x_mijXATiDlv2Q.png)
Adjust the tag’s configuration, shared event, and advanced settings if needed.
![Tag’s configuration, shared event, and advanced settings](/_static/blog/uploads/media/ff/14/ff14cc48807b9493ebbf6a5b01c8eaa2/07486f76fee8a2e418be40dfe8db3c11/AD_4nXcrLJ2yDu8XaJhikZ8B5bUevWoudfHQo9gDL5TgSdDp15wTMx5BuCAE8MVU0iFzQ2QNtuSNWP9vLVAHbeCN4tleOtWlT7XwQqn__qYNjK4yuuhK4WXz4KcBBT-HfbYZ4Am__8jkUA.png)
Click anywhere in the “Triggering” panel to specify when GTM should load the GA4 tag. That tag sends data from your website to GA4.
![“Triggering” panel highlighted](/_static/blog/uploads/media/12/36/12365f4d425ebfd25d3b9fa49638b634/efb7fc7e790f48645bc74e1b33d03617/AD_4nXfz1PO45xwNed7KVQv_kkHd9x4IpHzGHa-1p_kygHrPQWZfINeO4URc89inseDhhBldIk7WnWmvygHW2Mw5wK7tVMmGM95vk4VW1IFEKNNTdiJnyFaxjv1jpwk9dLE4BN5e3GR2SQ.png)
From the “Choose a trigger” window, select “Initialization - All Pages.” This will load the GA4 tag before any other tags.
![“Initialization - All Pages” option selected under "Choose a trigger" window](/_static/blog/uploads/media/42/5e/425e34a47507422fb58b38579770e696/9e79e0aab04101cd5825c29545e4783b/AD_4nXemjXtZYUedFhLXD1_wMYHd9ngPjsprYE6H3fzqA9yg98_n4YCDnKr21qpxYib0yp_6FGUUBzOT1STzUiSEIL5m5a0WoyugTRtD7rdW0V2ddKoRcOyA6OZIG2fh-KkNjRZFi-DDUA.png)
Click “Save” to save your new tag.
![Save the new tag](/_static/blog/uploads/media/85/bf/85bfa540eded32e839296c8df1a2146b/2f2338cce8e6ab23c636a8b732499bb6/AD_4nXeVYjQFqGa7aYFz9f-gIOWS1tR_mv8Venw-IWVa8G_RD_bFt9bK1lyMfuvGjfP9i1w8m6KooiiZAhvBFufAvMkKpvoFXSt9JsZunV8zSlWCmU6CTpPycWKMqmZrnP9mxPOTUV8.png)
Next, test your GA4 tag by clicking “Preview” on the container’s workspace overview.
![“Preview” button in container’s workspace overview](/_static/blog/uploads/media/60/d4/60d49ac22b721ead692a998e66816ed7/26d8d5acec54c1a23bc3999da634dd17/AD_4nXedPFvWIS8fWbZXSJk_wswHWskSzS_TqjjPs_CC2V1ID_x-NvwM6w5cqCHzgTBbUYYFow3CqKddM4bqEZqFwyT6jZWtFK1nbFvKyhVeFIcs4x6-1vbx80Vg-WZiKWgHKlh8Gzt08A.png)
The Google Tag Assistant will open in a new tab. Type your domain into the “Your website’s URL” field and click “Connect.”
!["Connect Tag Assistant to your site" window](/_static/blog/uploads/media/9c/86/9c86c7a20c96dcc49361b5709b2230b3/d718be647449d343afa20c9fb3f3f9c5/AD_4nXe3CDxfFXhImFT6AcrDLgUviiMZspIysElBgFyPE7ncBJ8yGyvRIen_s_C9ITvGxFZyl6L430-bVXelnWlrTzeT7K9vvgAc8249Uyn20-dH-jFx1OQO7_1N8-A6Tg4BjgkIOCElQA.png)
Your website will open in a new window. Leave it open and return to Tag Assistant.
If Tag Assistant connects successfully, a “Connected!” window will appear. Click “Continue.”
![“Connected!” window in Tag Assistant](/_static/blog/uploads/media/92/d0/92d0b68a8012c1b93dc6bd803ad39f6d/9ed5de3c8f194a8aa9091c96537cfa44/AD_4nXehEeo62jPw8D7KlVCEztoqOSClCpfERjFqbcjKUMxJjzUZHYUnItbkQQh8DOD-MLVcxiG2W_7Q4Atj3FhpY6Vi4vDuGuvW_Q7I_I4L1YfZu6zzH0ZADjKwjQDpE7hIkfW1yIqo4A.png)
In Tag Assistant, check the “Tags Fired” category in the “Output of [your measurement ID]” panel. If you see your GA4 tag there, GTM loaded it successfully.
![“Tags Fired” category highlighted](/_static/blog/uploads/media/24/66/24663c8468cb5bc86a8beef826134309/c6c47015cdcdf8ffacb3f23926437ca0/AD_4nXfDaxmYGMjHI35pUsmJzOz5f9bFlB5NoAZSeDm_7VhPSKcOkLVZGCuz8VpzCd4mDSWQuWzOopLv8lepQ81yGxkw1dv3Xbixw3aIPe70-GFMFcDnGCOtYkkHcATCe5qYVFBzONNMRg.png)
Close Tag Assistant and your website. Then, click “Submit” in the container’s workspace overview to finalize your GTM changes.
!["Submit" button in container’s workspace overview](/_static/blog/uploads/media/c1/b1/c1b1197068e6340ad17aab05c1642ae8/3b99e79213c8d491c7ce1322e3a32128/AD_4nXfy0EVjDZvh5fgAYt9qdk3Q_Ri7yPrBeK1h5F9qx4ENoqcG-qrjbWVmVsezfOXlPJzntBMPjrzW80EESu369gJ2EAJJcS0UtVdcjbdAy_lQ3w2vXBo5gzT_F2ENGDjOeaAXmYfk.png)
A “Submit Changes” window will appear.
Leave “Submission Configuration” as “Publish and Create Version.” Then use:
- The “Version Name” field to name the new version of your website (e.g., “GA4 installed”)
- The “Version Description” field to provide details of your changes
![“Submit Changes” window](/_static/blog/uploads/media/3d/13/3d13295d230d77ac2e8e09bd55032ecd/cdd3f3fcf0f4528c6dc98851a9ed8b1a/AD_4nXd1qd3_E716iSgfph1cSShbWG8Keea50RpDobd9n_yGPixg772DBjPs0E_g8tIi9YAKdkmKfk3LqsGpMWlYeh4pS_Ih4Lfbi2xIC4z74Se0aYYBxKgLPg1Rsp_ig8Oeh27IplVrDw.png)
Click “Publish” to activate your GA4 installation.
!["Publish" button in “Submit Changes” window](/_static/blog/uploads/media/fd/2d/fd2d332ec4b067c0b6de50f4c427d324/739844d7db4f010895bbc7ef00ef6713/AD_4nXdtL1MImJGrwnTG0HXXu3w7BfkeZPxXyvBGOIYIo3ji-MlSyZjjIFc6VJW2xTGW5A2RZj3Y_NyspRMbvbakic2cpFM94YDIwdbMujhtXPBAzmW8WF4pTJVohUAXsGteQ1HPOGmy.png)
Method 2: Install GA4 Using an Integration
Some website builders (like Squarespace and Wix) have native GA4 integration. They include built-in features to connect a site with GA4. You just add your GA4 measurement ID.
Follow these guides to install GA4 using your website builder’s native integration:
WordPress doesn’t have native GA4 integration. Instead, use a third-party plugin. Many are available, including Google’s Site Kit plugin, which we’ll demonstrate here.
Log in to your WordPress admin dashboard and click “Plugins” > “Add New Plugin.”
![Plugins option in WordPress admin dashboard](/_static/blog/uploads/media/bb/73/bb7343965ccebb89c0b13ef89e8e78e5/0221741ed6993e7f76442b2f9b5ffe54/AD_4nXf2OPqnnjjn410AzTp2-7VX1vV9qdDcVerSQ4pQI1Z0rmcwN35s0sFfwXx8SzBCizy3Z1HVIlBO_BD0I_Q-jJwjE2BvTSS5XF4gfqSPplWs0WcSJbd3lQGpyVIdruGNTyvokSeqXQ.png)
On the “Add Plugins” page, type “site kit” into the search field.
![Search for "site kit" on the "Add Plugins" page in WordPress](/_static/blog/uploads/media/e6/50/e6501e576ea825bd47311784ef1d0f81/3b41a61a2b236a89fce1252787390654/AD_4nXdrmk7RWoTKJ7GmZAIf0L9hS1_m_WaQBca-_fh3M4ms43hn3zDzt4sxgDChEvbtuZVZU3xVV7FOQEVlKTWH-LnMTTRYiJDIgRjbnFcAw6AO7njBFMyqUPSBZDHz0bRdd0Ma6ch3.png)
Then, press “Enter” or “return” on your keyboard to run the search.
Look for “Site Kit by Google – Analytics, Search Console, AdSense, Speed.” Click “Install Now" to add the plugin.
!["Site Kit by Google – Analytics, Search Console, AdSense, Speed" plugin](/_static/blog/uploads/media/7e/03/7e03c5fefac7b6d0f455c17b78974c08/19f39b62f4e6e1b84b508e98381e5a14/AD_4nXf2CQ9_kbSo1n4KevlR-rRqeXIKBguJCVPcsGbWz2MPfzdlUE8dbyDps5VyuRUFFkQ1gwCxe2CrSp-bHQUq8M2TlblCUVVwvkM-bmaUe7uTxJBhazAQ6AAqs4p0zH4ol6rtdXx-2w.png)
Then click “Activate.”
![Activate the Site Kit plugin](/_static/blog/uploads/media/a5/6b/a56b584855cc47b900b4b1ed0d8d173b/2cbff343b7c26e6bfd1da0f091f1c5d1/AD_4nXfKTGx4HJ1Lcexmfwx8GRKcl-VgYDMiTMQps2k6pJXv_YEN5SamgZ45Rlhc5Pym12eW5kkmRhDbZDpnQYB9ve04FikIOJLz0eHaV8ly2A6eBEzbWwZy8T0pm2g7ki0b5PwIhFfYWA.png)
You’ll see a success message confirming Site Kit activation. Click “Start setup.”
![Site Kit’s activation message](/_static/blog/uploads/media/54/2d/542dc3ae8913952ab7324130b64dbefc/58d191753fc09e6f8035d4d6cb882d5a/AD_4nXf2q7WdddDcxQGJqx4rLdJwDr5im8Yufi8t-3-1rCaJGnQxRh6-bB5B7gNUdN6LxmdAHE2xKJPLsUto1f7eANRsXg-RrO-CXxErHIaL6FE-Hb_g3HJDgigGw379__h8HfHlujsy.png)
On the setup screen, check the box that says “Connect Google Analytics as part of your setup,” then click “Sign in with Google.”
![Sign in with Google" button selected under "Set up Site Kit" window](/_static/blog/uploads/media/6d/d2/6dd218edc414a1d5297b344891abe74c/0773fd7e8447a4010d690ea3e6c32ede/AD_4nXd4Uri8YkniDlMgnS4hcNuPXHEXTAXQ4fW5DvdxyEalpxAB2qYqajLA13pXALRJdFxlNrWGPOE0LhTuggAFyU2gBb6OPo7OMSRjj8F78w3bcl9xBi1CbRvRJuNxW9RfkqJWVv7c.png)
Sign in and grant Site Kit access to your Google account as prompted.
![Sign-in to Google account to continue to Site Kit window](/_static/blog/uploads/media/0e/b1/0eb18b6bef30fb40829ead1eff159ee6/e3a50802cf9e52f56b2a045c091aeb36/AD_4nXejxDH4kDRYuqtPO2-lsAN9NFTGQigfefcD0heIlIeJc3Mw7Qn5esA2k3X_GPfzB3amdrWtQ-c7cjyWWokGwT5PcsdSO9H5y5n5fOign5g4Q-ic5qZgdblKYXMcXjsaQQaWFC_U.png)
Site Kit will guide you through these three steps:
- Verifying ownership of your website
- Turning on metrics in Site Kit
- Setting up Google Search Console (GSC)
When you finish, you’ll see a screen labeled “Set up Google Analytics.” Click “Next” to install GA4 on your site.
![“Set up Google Analytics" screen](/_static/blog/uploads/media/80/16/80161b13157cab128fa52921a0c20c73/ef324ceedc030cbe1a9634c15d6569cd/AD_4nXe3Wymz2Gi56FJtwpfttvrqbmUcLQPvY47CTeIxx52wonWLA4dtwV3IgQYmimEyAM6WGOQLSxdwlESNzZkvaM-9unzSlGfHqoTCtWZmL8O5B5T1V2i_9ZMStm4uXP5-UqEgiB0DeQ.png)
On the “Connect Service” screen, use the “Account,” “Property,” and “Web data stream” drop-downs to select the GA4 account, property, and data stream you created.
Then click “Configure Analytics.”
!["Configure Analytics" button under “Connect Service” screen](/_static/blog/uploads/media/90/90/909015649fba9011668a5da093a681de/a1c4014efaa70323d6054583f108f6b0/AD_4nXcWU4iaRfyaEr8WSyGQE133mmonf8dLuNjiM3fGQvGM4dq1z5eUa_MAkNma4X2tMhiSsued0tBBOuYiFNVLta7QdKfykO4hhCfL4VPuCy-tYun84KGbiBtqVtTBJIEP72xWtbXs.png)
A success message will confirm GA4 is installed on your website.
![GA4’s installation success message in Site Kit](/_static/blog/uploads/media/44/78/4478d5880caf6fd6efa601e91fbe9518/d3b10fae60224d2628ee2d49e67d4b2a/AD_4nXcQDSEDkFfIgiCr0qcauhE4GTyCGfDpbLIZ0u3Pn97hI8h8uhTy_qNv5T7nWF7CY4r0LxABxFrO3X9-lWXdocP5Z5aeY7nPyFAMUvn2vbnLVjHJODpY6npoN0L47vy1kTJKf8zz_w.png)
Method 3: Install GA4 Manually
To install GA4 manually, go to the “Web stream details”window for your website’s data stream in GA4. Click “Admin” in the left sidebar.
![Navigating to "Admin" in GA4](/_static/blog/uploads/media/5b/cd/5bcd8af336879e3ee64c7f9b15243395/03cdc4b6fe12c52e04b52133cd63cbb9/AD_4nXfq8FuZP_1lEuLJDYZKmmw3DdJpP_YzrWUzKai-l7Y2kkiH9fvjai0tGpqUhfEhmG9oRjJRMYjgml1uQx28ihEvsk1RnBb2XTPNjfBHzrzEP8-HWz3ixI0qIG3Eg4P-wKrFfFhB7w.png)
Under “Property settings,” select “Data collection and modification” > “Data streams.”
![“Property settings" pop-up in GA4 admin](/_static/blog/uploads/media/11/d6/11d6b4ba483d6b70ccae76a201a47822/b7331477f361fed6b669ec9ae3510535/AD_4nXdD9uP5EDydAkSZqvniDhDD4hF5hOLq2dlaa6zOv5S7AQB4Ii6vmk5X-StvaZNQDrCbdx-sAY7ByWeJwSNeiukC0aT4kVoYBjXF_xcADlOXaFVTsUKODXFlElqmJtdDZ1L4O-Lu.png)
Click your website’s data stream.
![“Data streams” page](/_static/blog/uploads/media/97/ee/97ee4d5f02e9f59aa5c111b27f3a4a6b/6f46e4e5c3f19b6cfdcac991fae34320/AD_4nXdCL4p6ZoA7aNWmZ6lzfLk3mcXZwG_tkxuIk_BumIVyqzS6Zs5yOL1qYRXU5TrX-5M8MzrgS1YZJFtNgYpuWM4AcEykge8d0kABTE6QbAzvJTLVtIAl_G4KRf-a9STGT73zXHH5rQ.png)
In the “Web stream details” window, scroll down and select “View tag instructions.”
![“View tag instructions" button under “Web stream details” window](/_static/blog/uploads/media/ee/53/ee535b0b51ac032b2efe195f86172c8f/d5ab80ab77a43b99704c4e2e4c1b2997/AD_4nXfMPdhcaxW1rK3LcfAonnRzdTYEHGbVSdd_pS5r10utN2kSWEtyWu1sdE5iby3gbVPmSITCG9DGMQ-d-sGwuNp36B2fmdPe0yMJBDF3Sq4J3dXd_fMzJw2nD36EHxuAbgVuG-IUzQ.png)
Click “Install manually.”
![“Install manually" option selected](/_static/blog/uploads/media/02/38/023824d0692e084a6e0cfb7115e9849e/6c9e0a2d010edb7d8c62b34ea4b6bf8e/AD_4nXfHCdyQ7UZVASrYGm2m_UVqZph7J_73MFsRUWM4DBgoQAREleX4XHwozbLxZj3aJ5zQNS5tUC5weYZbpRpEgGg_qS8XNWcicyLA5Q_M2yIaucjwHU1NULX960H1m7oIJ1p823PP6Q.png)
A code snippet will appear. Copy it using the clipboard icon.
![A code snippet page](/_static/blog/uploads/media/26/6f/266f266d028aeadfa9863b1694841137/451d53fb6b0d1d385a58fb7654a123c1/AD_4nXeIE7_7783AJiGzSOLZcUbK-nQAtDB_vI2cS9I8TZyBJKc8RGLZOmx3w-l413nAysiiYBlrfFYNVgyNt_2fnf00QJPaLvHbfK1Kcp9kAjd23iyu3kGsHLY9Eu93uv4TgegzvjdOCQ.png)
Paste the snippet into each page’s HTML, immediately after the opening <head> tag.
![An image showing where to paste your code snippet in HTML](/_static/blog/uploads/media/e6/a5/e6a53c6cf4866f6b9c39d69176c98ab4/70f2a0619533de978dfda3b82036cf70/AD_4nXdZ8LApjXcj7-bcYAijRtXdkV_mnHPrn8noa6pG-_plyCnFBt4Gm8YUSXdnkIClcUOgSBqoL5-br-QCH1DMEhTDMy1SQfYNWCamCzco7-4EzHCvWvaS-10jEvfvlp0-s-VJRsWK4Q.png)
Save your changes.
How to Track Events with GA4
UA treated “events” as specific user interactions (excluding page loads). GA4 considers all interactions as “events.”
GA4 events examples include:
- Page loads
- First visits
- Form submissions
- Adding items to a shopping cart
To see events in GA4, click “Reports” in the left sidebar.
![“Reports” selected in GA4’s left sidebar](/_static/blog/uploads/media/28/3c/283c5535b89e57a0485ccc850f391877/34425c3fbeb956a331cd0214570aa516/AD_4nXcIdHwxrW5RRwXmR8jPCjcCw67AmIi1QsfqubPG-XY1AdyWE0BfBcPV99ntckaCTyPpZ-xWKSiIphzjb0c6pQGaKLJFifQOlTx3JaSQ0kbD7rBW_UH3odrxJUn45fI_39z7DatdgA.png)
Then click “Engagement” > “Events.”
![“Engagement” > “Events" selected in GA4’s left sidebar](/_static/blog/uploads/media/c8/c1/c8c10a5a926cdf19fb105088bd56b5e8/a08fb7f78b359a9aa1c24e077105c0d3/AD_4nXcfzS8bD4tzA-5noxKqnC7gZLuzDqUfaUkyyqCAzT_G1CnxJbqk6e3nYzkoJuzTXvhPp-fQxVCE09GOxE5eIQWVRr40YvnbsqV_7BIwKbMfIBk44TwHHnosrPqt9_7h5vuYP9ZmMw.jpeg)
You’ll see a list of events GA4 detected for a specific date range.
![A list of the events GA4 has found on a website](/_static/blog/uploads/media/58/b6/58b66e06e734168c32d9591536bcc47c/28611aa0da611f3a854027bdc55e86af/AD_4nXcCO71cfIVP9zCLEkShqGqDYWm1UY9X2BnazhXGq9W_yUBS_50BmPXF6QdFVuIeW-5ir82i_y-BYm1BI0EXENqyR5BiIKwdMarOLPCVmy7foFPzE3t3fyWmbWgcKQ8H9N504vjA9w.png)
Each event entry shows:
- Event count: Total triggers of that event
- Total users: Unique users who triggered the event
- Event count per user: Average triggers per user
- Total revenue: Total revenue the event generated
!["Event count," "Total users," "Event count per user," and "Total revenue" event metrics in GA4](/_static/blog/uploads/media/b6/9f/b69f102f45bf882e7cb8c7d17ca6b274/4266acb4c7e87642a51f64d54025c79d/AD_4nXe0mbx85URa9rA81MeiMEL4JPUMPYG5xBBmUczQ6dUF7Npx39GCf3jDjMaYwLEfwrXkNGGaCi_3fzHoKoyyd8wwWaNKutx_ZowCDFN5tfMDdCFUL3kIBlCWSs7cNmYIaeANuRjLeg.png)
Click the date range at the top to change the event reporting time frame.
![A list of the events GA4 has found on a website](/_static/blog/uploads/media/a1/1e/a11e4724adc9e5a4447c48286e583e13/e95fd77d75bfd174dea9d1f2a41bdc86/AD_4nXcsr4ypuCMhmB-mGRoggIK_DMtQ5co6200iyh91ZfpgAG8u0wW-bfqD862ebwqqTePtcbXBtG7KhULH3xeqVTap_cloafmtvCwO35l41KDnxOzMpbYyTcPfW3YCtmRn57R9Cf0LbA.png)
Click any event in the report to get event-specific metrics like:
- Event count by country
- Event count by gender
- Events per session
For example, here’s the user_engagement event report:
![GA4's report for the user_engagement event](/_static/blog/uploads/media/4b/d4/4bd4395c5d22f31c244436c0a3875939/64fea6b50e503dbf4f77a5ab7d267bc2/AD_4nXdSAzFiZfF4cuBT7gHS2z83N4i2rEF-leAVNPcXxw9xiXZ4PwXr_IcyRkZVennu-KIwKOepK5HB_ovTsCUZ3TUuFnW4DRd9MLG8Oi0o3wfAGTs19_MM6eaAv7HzyD2J7VqSKDG0Wg.png)
You can also create an “Exploration” (an advanced custom report) for certain events.
Further reading: How to Create a Custom GA4 Events Exploration
How to Track Conversions with GA4
A conversion is an event that fulfills a business goal. Examples include:
- A product demonstration booking
- An order placement
- A file download
GA4 doesn’t provide default conversion events, so you must set them up yourself to match your goals. GA4 will then record them as they occur.
To view conversions, click “Reports” in the left sidebar.
![“Reports” selected in GA4’s left sidebar](/_static/blog/uploads/media/63/00/6300f892fdeb0342b852a3764e664fd7/7c9b73d0d03edaf43d253b8d2251769f/AD_4nXfCqq_J-cvXf0eBTfvlfmiB8cyUbCynIkTMw7xp1lgK-5I415kmn8XXqKcnetBzdr8OQA17tjwcOiHs6mBC2OKVNLtuKjLD6r4Gcb6D7Rph8ncv2f3x7fgpo3dRHP0y6QFdA4N-HA.png)
Then click “Engagement” > “Conversions.”
![Navigating to “Engagement” > “Conversions" report in GA4’s left sidebar](/_static/blog/uploads/media/14/df/14df4c898767f7d6bc79cd69c2fc91cf/2b0e58c4ecea74cb3d5dab8d7b8d1c65/AD_4nXetksH-1VDDzV9UhT82yp9pWxeS1XwKyEUfnKnxQWI6eK9sau_w-O_vVx_IFYgB_zc2Ff8dLugmCDrM9i41pjFNnuS8m3iZAlG7ybxLovpppYTlHLxYMLm91nEb2JoYJCZHMJhd.jpeg)
For any given date range, you’ll see:
- Conversions: The number of times the conversion event occurred
- Total users: How many unique users converted
- Total revenue: Revenue earned from that event
!["Conversions," "Total users," and "Total revenue" metrics in the Conversion report in GA4](/_static/blog/uploads/media/89/48/894867afc03b7d8d966ef1245fe8439c/3d4a0da733fefd376f8786e5134a2780/AD_4nXdtznC0gOyILfVIXgJTlAnBgrsQHYNRaV28I5JDtzi0lryn2YX2KXnV01vR6DAEFHNUV7bUUqSHsQOnsypDczr1r1HtV9DRn2tjtPhtSq1N5gTnT6NXYgVmTTEDaJ55TluS5BrX8g.png)
Use the Conversions metric in other GA4 reports to track conversions by traffic source, page, or other attributes. For example, in the Pages and screens report, you can see how many conversions occurred on each page.
!["Conversions" metrics in Pages and screens report](/_static/blog/uploads/media/cd/6d/cd6d26ad50745a4108430787b34114e3/bf47403ef722818b41d143b873241c72/AD_4nXfLW_satXQMlRFyCkO_HIShraOblebAuD8cBYgqwYa62fK3wbepv4C436rfagclRP98IPr-C0sbG2SsWs4EMqL_CNiGvXMXGm9oZyqxxXLfybVzt-y2Pnp8_LdeOIMd9nZo7pylLw.png)
Click the “All events” drop-down under the Conversion metric to see results for specific conversion events.
![Conversion metric’s “All events” drop-down menu](/_static/blog/uploads/media/a9/df/a9df142de2af492c30658d5044879423/39aa5b61aae7f0ee52bfc168231f66c7/AD_4nXdGBiiMvxeP6TRywmOhg8JYhOzH9tmUqFkDDWrGSeMMMYwmz_EIst1eaDs63nAXHNAmUC40_0IShzsspEcHezbCUDzUpWJvs93g7lwDRW5w57dUpR4SaXK22noFtksEvaRyAIq7wg.png)
How to Import Data to GA4
You can import data from other sources (like CRM tools) into GA4. This centralizes your data so you can analyze it all in one platform.
Data you can import includes:
- Ad cost data
- Item data
- User ID data
- Client ID data
- Offline event data
You can import data manually with a CSV file, or you can schedule regular imports from a CSV file on an SFTP server.
To do this, click “Admin” in the left sidebar.
![“Admin” selected in GA4’s left sidebar](/_static/blog/uploads/media/1a/95/1a95b56995058e68f2c7b8643ac4620b/e551fc38cbf99779d5892466119c5da8/AD_4nXfmS3Sdg3qvwD7s3ysc-rgQvGQIg4HMbCRpuacMCEUuhW_PKn1w7KOanbsU0iC-JsBwiIpZT9JC2C4JgvIZ1uBRj_ySzsJ2U01QdJHv0GIhx6pnwAw4EjTadyZq4N4vvarvLFR5Tg.png)
Under “Property settings,” select “Data collection and modification” > “Data import.”
![“Property settings" window in GA4](/_static/blog/uploads/media/3f/d0/3fd0e3e60c56fd2940d2c751ffa3c70c/dea2e20331a008c11c0316143c9fdca4/AD_4nXfxxfjPqA1oqxqyiSBf4lyyJzdCBoRr6XhqrrVlaOiZT24-KGsVVNIihgXsFFuEs-zpa44TXbwMgQdMkH2IyXE49_Zv3ILJlpOiMo1IAetMGg9ES36FIfy4fMG0Qas0v-i74t2A.png)
Click “Create data source.”
![“Create data source" button under "Data Import" window](/_static/blog/uploads/media/3d/fa/3dfacb92edb08e2bb95e2fd7379f2079/692935665838ef17b95a796311d8f134/AD_4nXeJFlCJhhoy8OF5L3KpFXVfMHzyC-IHi3LXhyZC0TXRZnJHMSoKOOSNm5TUS-02woVZZ0JfYEJ8Cyekt2_yqS4MSERjCplqvbZlgJ4hYaijzFwOgnfHB8NZWBjcPi9HjavJ4ju5YQ.png)
Give the data source a descriptive name and select the data type you’re importing.
!["Create data source" window in GA4](/_static/blog/uploads/media/3e/37/3e37ce10f1144c7fc21b79da30f5f7a7/95ed861c49930be990fd3798651c3153/AD_4nXd8esO5OvPGwbPdnYGsMWLlKQscHBg_FzgwOW45Pux9qCxVIHRCfTPH3YnilrkISDIiJKyTvpcP5M1uiZMhFRVTolT008wcGcurmTur6xDZurft6_C3QO9jDYDYKelzEhrLsSKZsg.png)
Scroll down and choose your import source.
!["Manual CVS upload" option selected](/_static/blog/uploads/media/9c/a2/9ca2f2bd91344f5b6e46e68b442a6cfb/17476a3ef266bc5ef0a9f0d1af45a159/AD_4nXcv8gb5u59p01_VqzaTBdNe_iBDQ7Fga48epasRw6EeVvBDDHHPMFutlDRGUnR5I8YCwz_fCkk3sPFXm9IPbUZo8eas3Un2HAJJxBFkxV8r8lnjPDbRSeSbWQh_YeSp0sD3XVsB2A.png)
If your import source is a CSV file, click “Upload CSV” to upload the file. If you’re using an SFTP server, switch the import source to “SFTP,” fill out your server details, and set up the import schedule.
![“SFTP" option selected under the "Import source" section](/_static/blog/uploads/media/d2/75/d27529ce768a9552056ac4e0fd2d01f2/4e291e3e229b898d4c00310e6103c738/AD_4nXebWBa1_mVhpJ9DD6weRzmKlevdLbep-Ktf_jPZzR94_uRucnBp9e_Y3d_2wPOtXVRQdntiSg7vOkmktRvXOvCBFCMiYChhhqCM2T3wtFr9dCIzN_deGvL_w9jXdGv3-rGdLFhZLw.png)
Click “Next.”
!["Next" button in "Create data source" window](/_static/blog/uploads/media/a9/14/a91467a0e450b8ce831417ff3efe5b2c/369794e5ddeb0d264b7588002b090ef4/AD_4nXcc9TkSt8bC9QM4OweFYMn51mI9ai3uZ95fspzZU_tXVBLIJhWDgzcwWzBxZzaz-iaottlAJvT4PrjOiBzbMdg9W3QRPTR09Trf1fl_j3zsF7zpk4_XIyUeCmu8e10Gm9wcI_2VIw.png)
Map the data fields from your source to GA4’s fields.
![Mapping manual data sources window in GA4](/_static/blog/uploads/media/8d/5c/8d5c760b4c1e56080672e1fa5f660660/8b4bf58a86388037c58d1f00da3a3693/AD_4nXcdvSoi5iSsU3Kke8UiL9dhc7nR4Z3uIcoTtyIERKjHK0ZO1Gljk2eLdjt3X8wGHJ1oIZCLEFA5Kyww9W4etX5t6mSuytZo1bdLDrMr3RBAOLub5OcW_VmTcXWspUhNCeYP_6fnBg.png)
Click “Import.”
![“Import" button](/_static/blog/uploads/media/bc/ca/bcca9499f95a60678547cdd24aa1c654/aa350501cc63859c95b8516f11ce07c1/AD_4nXemBqDyblYiF_ww8Jo8Xiox98TfwMl2EP61yq9iuHHE-QEEDhbnoxW74oveYbTx3o0fyLNiyluPhyhkB4b5E6VaDWAgklCu-8w3J-D-3DGAm59_dcTt7npd8MvUjHwMQmMziPOLYA.png)
The import will start right away.
If you’re importing from SFTP, click the pencil icon to rename your import fields to match the CSV.
![Mapping import sources with SFTP server](/_static/blog/uploads/media/ea/ff/eaffd1bd33dd4962c6f1e738ae55bad0/105885c3624bc8f7ff3e6635e8a3bcbd/AD_4nXdGrhVVheQ9aJuuWtFvd-eiVX2kD3iLRwbAQ4pJnYAhBVBpKfeM1f02urUcPOeyhHDFHCiFmHtctUfUDcVDCe8muH0BPmJ0mTs-Ang_BY1w0QKYxkQKU0kBS4_5nJ5kUwHDiVHVpA.png)
Then click “Create & generate key.”
![“Create & generate key" button](/_static/blog/uploads/media/6e/71/6e719c446838ac03f8a1f9139e39b756/2c8a234d378851a58b939752b7fcc722/AD_4nXe8K45V5uXhatMbRWVe0GUyTUxdlD38Vl1x6wsm5b5fO1emned04Los_-dIkjJwdDxZS8Z6Wa9I_hX3g9rVYGiCFj2x-9zRqEFc7xLtUmAQ8PjF4YyEKGNKUWEmglIq7FJronxUeQ.png)
GA4 will produce a public key to authorize the connection to your SFTP server. Copy this key and add it to your server settings.
![GA4 generates a public key to authorize its connection to your SFTP server](/_static/blog/uploads/media/81/00/8100615ad789ee29e56892867173a8de/a5a51136c53b389eb6472a059df018a9/AD_4nXfGPmHxavJelzc9rtnXlPRyMSQJs9IRu3mka2ttzVLNFEhKA8_C9TkclpqrEUFn58-HXjGyt0j39msQsfYx8H4DGdDvFCpgYj5au_S0wdjuYCBHBgCSn6KB2bHWKuhBXlTRP_N8lQ.png)
GA4 will import your data according to the schedule you set. Then you can analyze data from GA4 and other sources together.
Types of Analyses in GA4
GA4 can help you analyze:
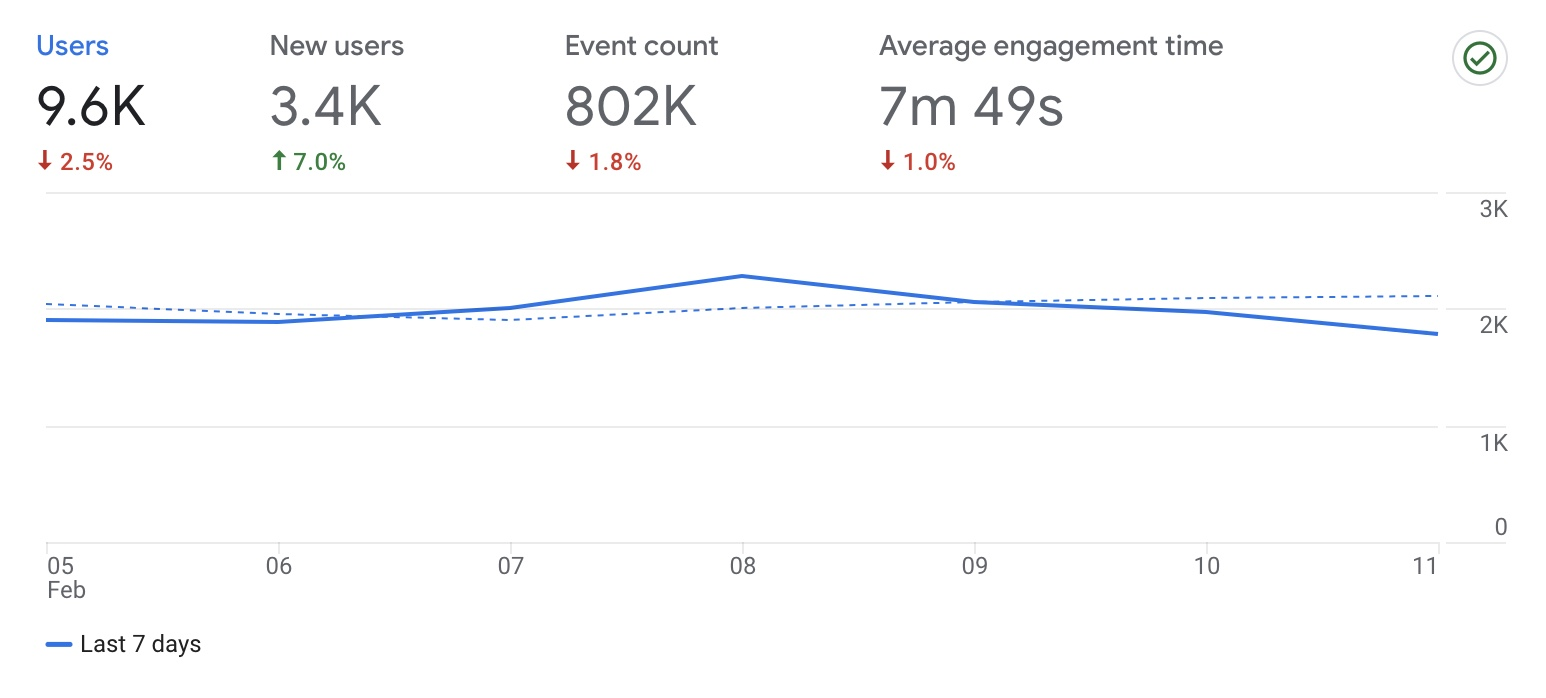
- Number of users who visited your website. You can spot trends over time by adjusting the date range.
- Demographics of your website visitors. Includes country, city, language, gender, and interests.
![User attributes overview dashboard in GA4 shows demographics of website visitors](/_static/blog/uploads/media/8d/d7/8dd70acd66c9ab856f26d465da784e1c/0f79ae4697e66e1b90fb57d39893d281/AD_4nXf0p1VvGP7ouDivGXd5z7TIFAFsQlV5JvRbukmDNsJZBlG4F4jxv69jp3-E75Pb692P1rQMh8mCI_maQMFoe4Gul8nENT2xlI-2FlTfBqPJf06lwrDq2wk3KIMG0pMJkGOEwfeI4g.png)
- Most popular pages. Includes how well they drive conversions.
![A table in GA4 showing website’s most popular pages](/_static/blog/uploads/media/6b/96/6b96af9c9b0716e5f0a6a167bb08ac69/9d400ae92984efab95f2b824f053393a/AD_4nXerH5u9EFWzh2fwpDAkLK7dH_7KGGR_EHY2CblMFszggBCJ9yYeJ_lc3jZQxmbR7EG_iAqxVcxsJgO8aykjvB2J5AMx6pIeuGaR68W3oi_Ax0HWS3rqYmLIPFUHHRqMqzLqcRGAMg.png)
- Events happening on your website
![A table in GA4 showing the events happening on a website](/_static/blog/uploads/media/02/db/02db50f873b5f26cb292e8c3f36edfbe/c1a26db2cf6e4c49f01f2fa3b0693a79/AD_4nXdDjAL8c9LT9rUkiDNpC3HmcCrnDeEYg-FuKH2-7HJYRNDqY5Uqyr7KXueFrGH-ErB-3jz0obSMmXAx2Q92GT2CeJY6DUSkCrRyjd22LjdH2J3L6J8j-TCE4vAwdtCeu59AnhDxkA.png)
- Conversions on your website
![A table in GA4 showing the conversions happening on a website](/_static/blog/uploads/media/75/de/75ded77f0cc0f8cd93f3aa4f49f2d368/88fe6d8a9c0fbb179a8658352851a029/AD_4nXcN4NReZFYoAsNuMNu_R2XEQo8k8lLmdSwcjHb1tFtiKcDdSWvFFelIQ-JW0UYj0cb624lEJ8sDI_g1Euv_vmhs-SAyVj5bhmvWlklXtoiwAL92VzoIxmSob0hW4DEJ6cZ1WY2JcQ.png)
- Top traffic sources. Tracks organic search, email, referrals, and direct visits.
![A table in GA4 showing top sources of website traffic](/_static/blog/uploads/media/13/f4/13f4c04387d704acbf364b0c154e8a18/a6b8cb6893cdc559093700e045c76c6f/AD_4nXdUsPGRX3jJhAmDmyWQ1bM9RwC1kpB91FVQI_losUshhRmVYBAowIpd6JYVbvBU_WnVzXwp2LH-yhLhkxj6Qo37xGqZ75k4EYvP9b4DXZc7nW_mQdkPdP7L-KnEc0-mQwI_1pA.png)
- Devices users use to visit your website. Distinguishes desktop vs. mobile and even operating systems and browsers.
![Tech overview dashboard in GA4 shows the devices users use to visit a website](/_static/blog/uploads/media/9e/a6/9ea63d0dd50fda83a79b9b403d69dfea/2c4326630a2ea576a69834ebfc72fdb6/AD_4nXd-vWpuKliGqgeeISTumRuEc1ez_bIQX4lloiOdnjPupREQ0m3xZlIFX4pdQgAEeWBWx5b4xtOMJeEk-NcEyE_YmODMstJ1PhohJdFaxIa83J65aFZ1HSblFJ1Nl4BP8J6optWAVw.png)
- Purchase journeys. Tracks from the start of a session to the viewing of a product to the checkout, and highlights where users drop off in the purchase funnel.
![Purchase journey dashboard in GA4 shows users’ purchase journeys](/_static/blog/uploads/media/a0/ac/a0ac6810f2553d4657ce8f516fc55543/a5a954616b41ac2bfe28eaf2f477613e/AD_4nXfBy31z8QLpmkhMpOt5Mwx9ki1PrSreF6jg3o9z9nZJz_gfuGoNL04xtKRg6AigITsO4by-3jlQ54f_N-IRbIu0aMKYhmI9KDwSesnfuMITZkhtzXrvrfIqKJioeE6rh5TfcXueCg.png)
Use these findings to assess how well your website increases brand awareness, grows your customer base, and drives sales.
If you need easier-to-read reports, AI Narratives for GA4 can help. It uses your GA4 data to deliver straightforward reports on page views, conversions, revenue, and more, along with recommendations for improvements.
!["Weekly report" in AI Narratives for GA4](/_static/blog/uploads/media/01/f3/01f3be7784e9e40602d012f706ceb90c/9e74316cf4ca856ea840e6e057a0f6d4/AD_4nXdwYFpJ1RzOYkUzpqCOJQGuFd06h1BCfrm6i6pPMleEaZgXRc_h1Yal5oaKaoGbGteMiyXIfQFOftqNO8kbYXhZE72uPLnvY6LH8Z-SeNo6ipJTCYpUhyGl7LTE2yfOgVQcQ5Yb.png)
AI Narratives for GA4 can also send automated email reports and notify you of unusual traffic changes.
Consider connecting GA4 with other tools for deeper insights. For example, Semrush’s Organic Traffic Insights integrates with GA4 and GSC to show keyword, user, and session data from those tools and from Semrush’s own database for your landing pages.
!["Landing Pages" table in Semrush’s Organic Traffic Insights tool](/_static/blog/uploads/media/47/2c/472cef70da1641382929c19de804b336/4f345d3a50ff25e37cc1ac43d89b2664/AD_4nXd7rXkFGvQHy18eKXpYcGnn6yu6ygdspQOzjk-VpMxb-sEVb6jrjD_9t3fzTcY4wGKfZDb5OLlfg1uuFJa8eOhp2f4tkZozzUZAHj1uYq_N8jekMF8SJiZX83lBzxonMxf7S7AbbA.png)
It can also reveal which keywords drive traffic to your pages—even if GA4 labels them as “(not provided).” Then it shows your ranking positions and share of traffic for those keywords.
!["Keywords" table in Semrush’s Organic Traffic Insights tool](/_static/blog/uploads/media/ca/3f/ca3f834e24d685acccfe55ed90000d16/7133b84d4df6578501f118b278fbdfa9/AD_4nXdQieFQDmDowrCQsN1GfeLB_1rwQKHP5AWADrPlX_tLotXLOOzlQ6Ptvlo_7rdHeH6Hwsaev_jkosrVi-YgK5iTILZUkMfTk4poDJ6voNJraaQpfdoFNSPLyBbvG-GdeND5GbZH.png)
Get Started with GA4
Setting up GA4 requires some initial steps, but the free data on website performance makes it worthwhile.
To enhance your GA4 experience, use AI Narratives for GA4 and Organic Traffic Insights. These tools can enrich your GA4 reports with recommended next steps and offer a broader view of your search rankings.
Try both for free with a Semrush account.
FAQs
How Do I Get Access to GA4?
To get access to GA4, sign up for a Google account, then create a Google Analytics account. Follow GA4’s onboarding steps. If you’re installing GA4 on a site, use GTM, a GA4 integration, or manually add the GA4 snippet to your webpages.
What Is the Best Practice for a GA4 Setup?
Google recommends no more than three data streams (one for a website, one for iOS, and one for Android) per GA4 property. For multiple websites or apps, set up multiple GA4 properties if your data measurement objectives require them.
How Much Does It Cost to Set up GA4?
GA4 is free to set up. You may incur costs if you use paid third-party tools or integrations. For example, if you have a Semrush account, you can use AI Narratives for GA4 for free for seven days, then pay $39/month afterward.